Makeup Brushes: Clean, Store, and Build the Perfect Brush Set
Introduction
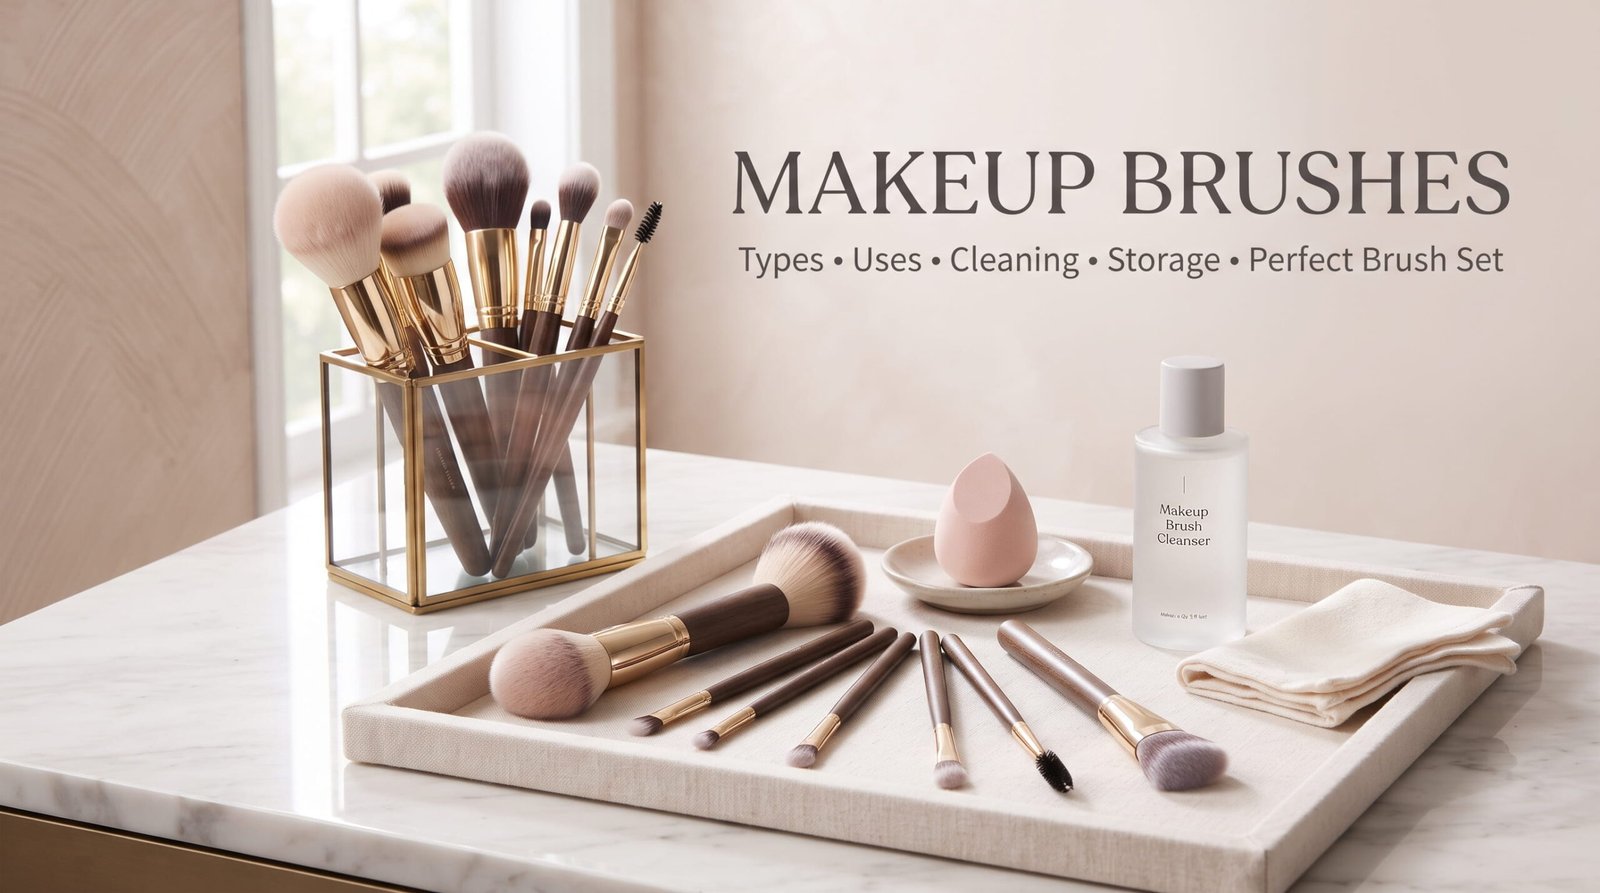
Makeup brushes are among the most useful tools in any beauty routine. Whether you are applying foundation, blending concealer, sculpting your cheekbones, adding blush, or creating a smoky eye, the right brush can make makeup application easier and more precise. At the same time, using the wrong brush—or using brushes that are dirty, damaged, or poorly stored—can make even a good makeup product look uneven.
Walk into a beauty store and you may find dozens of brushes with different shapes, sizes, densities, and bristle materials. A large fluffy brush may be designed for powder, a dense brush may work better for foundation, while a tiny angled brush may be intended for eyeliner or eyebrows. For beginners, this variety can feel confusing.
The good news is that you do not need a huge collection to create beautiful makeup. Understanding what different makeup brushes do allows you to choose a smaller, more useful set and get better results from the products you already own.
This guide explains the main types of makeup brushes, what each brush is used for, how to choose the right bristles and shapes, how to clean your brushes safely, and how to build a practical brush collection for beginners and experienced makeup users.
What Are Makeup Brushes?
Makeup brushes are beauty tools designed to apply, distribute, blend, and detail cosmetic products on the face and body.
They are available in many shapes and sizes because different makeup formulas and areas of the face require different levels of precision.
For example:
- A large fluffy brush can distribute powder across a large area.
- A dense foundation brush can help blend liquid or cream products.
- A small concealer brush can provide targeted coverage.
- A tapered brush can help apply highlighter precisely.
- A small blending brush can soften eyeshadow transitions.
- An angled brush can define brows or create eyeliner.
The shape, density, flexibility, and material of a brush can all affect the final result.
Why Are Makeup Brushes Important?
You can apply makeup with your fingers or a sponge, but brushes offer a different level of control.
The right brush can help you:
- Apply product more evenly
- Control how much product is deposited
- Blend different shades
- Create sharper details
- Build coverage gradually
- Reduce patchiness
- Create more precise eye makeup
- Achieve different finishes
The brush itself does not guarantee perfect makeup, but choosing an appropriate shape for a particular product can make application significantly easier. Makeup artists often select brushes based on the product’s texture, desired coverage, and area of application.
Main Types of Makeup Brushes
Although brush collections can contain dozens of specialized tools, most brushes fall into a few basic categories.
1. Foundation Brush
A foundation brush is designed to apply and blend foundation.
Common foundation brushes include:
- Flat foundation brushes
- Rounded buffing brushes
- Dense kabuki-style brushes
- Flat-top brushes
- Duo-fiber brushes
Dense brushes are useful when you want more coverage, while a softer buffing brush can help create a more blended finish.
For liquid and cream foundation, synthetic bristles are often a practical choice because they can distribute product smoothly and are relatively easy to clean.
2. Concealer Brush
A concealer brush is smaller than a foundation brush and allows more precise application.
It can be used for:
- Under-eye concealer
- Blemish coverage
- Redness
- Around the nose
- Spot correction
- Cleaning up eyeshadow edges
A small flat synthetic brush works well when you want concentrated coverage, while a slightly fluffy brush can soften concealer around the eyes.
3. Powder Brush
Powder brushes are generally large, soft, and fluffy.
They are designed to distribute loose or pressed powder without depositing too much product in one place.
Use a powder brush to apply:
- Setting powder
- Finishing powder
- Powder foundation
- Body powder
A large fluffy shape is particularly useful when you want a light, diffused application.
4. Blush Brush
Blush brushes are usually medium-sized and softer than dense foundation brushes.
They may be:
- Rounded
- Angled
- Tapered
- Slightly fluffy
A rounded brush can help create a soft flush on the cheeks, while an angled brush can provide more directional placement.
5. Contour Brush
Contour brushes are designed to place darker products beneath the cheekbones, around the temples, jawline, or sides of the nose.
Common shapes include:
- Angled
- Tapered
- Small dome
- Flat contour
A tapered or angled shape gives you more control over where the contour is placed.
6. Bronzer Brush
Bronzer is generally applied over a broader area than contour, so bronzer brushes tend to be larger and softer.
Use a bronzer brush to apply product to areas where the sun naturally hits the face, such as:
- Forehead
- Cheeks
- Nose
- Jawline
The goal is usually a diffused appearance rather than a sharply defined line.
7. Highlighter Brush
Highlighter brushes come in several shapes.
Popular options include:
- Fan brushes
- Small tapered brushes
- Small fluffy brushes
- Precision highlighting brushes
A small tapered brush is useful when you want concentrated glow on the cheekbones, while a fan brush can provide a lighter application.
Eye Makeup Brushes
Eye brushes are among the most varied brushes because eye makeup often requires precision and blending.
8. Flat Eyeshadow Brush
A flat eyeshadow brush is designed to pick up and place eyeshadow on the eyelid.
It works especially well for:
- Shimmer shadows
- Metallic shadows
- Pigmented colors
- Packing color onto the lid
Instead of sweeping the product away, gently press or pat the shadow onto the eyelid when you want stronger pigmentation.
9. Blending Brush
A blending brush has soft, flexible bristles and is used to blend eyeshadow edges.
It can help create smooth transitions between:
- Light and dark colors
- Different eyeshadow shades
- Crease and lid colors
Blending is one of the most important steps in creating a polished eye look.
10. Crease Brush
Crease brushes are usually tapered or slightly rounded.
They are useful for placing eyeshadow into the crease of the eyelid.
A smaller crease brush provides more definition, while a larger fluffy crease brush creates a softer effect.
11. Pencil Brush
A pencil brush is small, narrow, and pointed.
It can be used for:
- Lower lash-line eyeshadow
- Smoky eye detail
- Inner-corner color
- Smudging eyeliner
- Adding precise dark shades
It is particularly useful when creating detailed or dramatic eye makeup.
12. Angled Eyeliner Brush
An angled eyeliner brush has a thin, slanted edge.
It can be used with gel or cream eyeliner and is also useful for creating precise brow strokes.
With practice, it can help create both thin and dramatic eyeliner styles.
13. Brow Brush
An angled brow brush is commonly used with brow powder, pomade, or other brow products.
Apply short strokes that imitate natural brow hairs rather than drawing one continuous line.
Many brow brushes come with a spoolie on the opposite end for combing and blending the product.
Lip Brushes
A lip brush is small and precise.
It can be useful for:
- Applying lipstick
- Defining the lip border
- Blending lip liner
- Applying bold colors
- Creating precise corners
Lip brushes are especially useful with dark or highly pigmented lipstick because small mistakes can be more noticeable.
Fan Brushes
Fan brushes have wide, thin bristles arranged in a fan shape.
They can be used for:
- Light highlighter
- Soft contour
- Sweeping away loose eyeshadow
- Applying a subtle amount of powder
They are not essential for beginners, but they can be useful if you enjoy a lighter, more diffused application.
Kabuki Brushes
Kabuki brushes are typically short-handled and densely packed.
They can be used for:
- Powder foundation
- Mineral makeup
- Bronzer
- Blending
- Buffing
Their dense bristles can provide a polished, more concentrated application.
Stippling Brushes
Stippling brushes usually have two layers of bristles with a lighter, airy appearance.
They can be used with:
- Liquid foundation
- Cream blush
- Cream bronzer
- Highlighter
Instead of dragging the product aggressively across the skin, use gentle tapping or stippling motions.
Natural vs. Synthetic Makeup Brushes
One of the biggest decisions when buying brushes is choosing between natural and synthetic bristles.
Synthetic Bristles
Synthetic brushes are generally made from man-made fibers.
Advantages can include:
- Easy cleaning
- Smooth application of cream products
- Often suitable for liquid products
- No animal hair
- Consistent shape
- Often easier to maintain
Synthetic fibers are commonly recommended for liquid and cream formulas because they tend not to absorb as much product as some natural fibers.
Natural Bristles
Natural-hair brushes are made using animal hair.
They are traditionally associated with powder makeup because natural fibers can have a texture that works well for blending dry products.
However, personal preferences regarding animal-derived materials, allergies, maintenance, and ethical considerations should be taken into account when choosing brushes.
For many modern users, high-quality synthetic brushes can cover almost every everyday makeup need.
How to Choose the Right Makeup Brush
Choosing a brush should not be based only on its appearance.
Consider the following factors.
Consider the Product
Cream and liquid products often work well with dense synthetic brushes.
Powders may work well with fluffy brushes.
Consider the Area
Large facial areas require larger brushes.
Small areas such as the inner corner of the eye require smaller brushes.
Consider the Finish
A dense brush generally deposits more product.
A fluffy brush usually provides a softer, more diffused application.
Consider Your Makeup Style
If you wear minimal makeup, you may need only a few brushes.
If you enjoy dramatic eye makeup, investing in several eye brushes can make blending and detail work easier.
How Many Makeup Brushes Do You Really Need?
You do not need a 20- or 30-piece brush set to create a complete makeup look.
A beginner can start with approximately 6 to 8 versatile brushes, such as:
- Foundation brush
- Concealer brush
- Powder brush
- Blush/bronzer brush
- Eyeshadow packing brush
- Blending brush
- Angled brow or eyeliner brush
- Small detail brush
Some brushes can perform multiple jobs.
For example, a medium fluffy brush may work for blush, bronzer, and setting powder depending on its size and density.
Buying a smaller collection of useful brushes can also prevent you from accumulating tools that rarely leave your makeup bag.
Makeup Brushes for Beginners
If you are new to makeup, don’t worry about learning every brush name immediately.
Start with the basic face brushes and a few eye brushes.
A practical beginner kit could include:
Face
- Foundation brush
- Concealer brush
- Powder brush
- Blush brush
Eyes
- Flat eyeshadow brush
- Blending brush
- Small detail brush
Brows
- Angled brow brush with spoolie
With these tools, you can create everyday, party, bridal, and even smoky makeup looks.
How to Use Makeup Brushes Correctly
The technique matters as much as the brush.
For Foundation
Apply a small amount of foundation and work from the center of the face outward.
Use short buffing motions rather than pressing too hard.
For Concealer
Place small amounts of concealer where needed and tap or gently blend the edges.
Avoid excessive rubbing around the eyes.
For Powder
Pick up a small amount of powder and tap off excess before applying.
This helps prevent excessive buildup.
For Blush
Smile lightly if that helps you identify the cheek area, then blend blush outward according to your preferred makeup style.
For Contour
Use a controlled amount and blend the edges thoroughly.
It is usually easier to build contour gradually than to correct an overly dark application.
For Eyeshadow
Pack color onto the lid with a flat brush, then use a clean blending brush to soften the edges.
Using separate brushes for intense pigment and blending can make eye makeup easier to control.
How to Clean Makeup Brushes
Cleaning your makeup brushes is not just about keeping them looking attractive. Dirty brushes collect makeup residue, oil, dirt, and microorganisms that can contribute to breakouts, irritation, and infections.
The American Academy of Dermatology recommends washing makeup brushes every 7 to 10 days to help protect the skin.
Step 1: Wet the Bristles
Rinse the brush tips under lukewarm running water.
Try not to completely submerge the brush head.
Step 2: Apply Gentle Cleanser
Place a small amount of gentle shampoo or suitable cleanser in your palm or a bowl.
Step 3: Massage the Bristles
Gently massage the brush tips to loosen makeup residue.
Avoid aggressively twisting or pulling the bristles.
Step 4: Rinse Thoroughly
Rinse until the water runs clear.
Step 5: Remove Excess Water
Gently squeeze the bristles with a clean towel or paper towel.
Step 6: Dry Properly
Lay brushes flat on a clean towel with the bristles extending slightly beyond the edge of a counter.
Avoid drying brushes upright while they are wet because water can move toward the handle and weaken the adhesive holding the brush together.
How Often Should You Wash Makeup Brushes?
The ideal cleaning schedule depends on how you use the brush.
Brushes used with liquid or cream products generally need more frequent cleaning than brushes used only with dry powders.
Cleveland Clinic recommends washing brushes used with wet products approximately once a week, while many powder brushes can be cleaned less frequently. Eye-area brushes also deserve regular cleaning because the eyes are particularly vulnerable to infection.
If you have acne-prone or sensitive skin, frequent cleaning may be especially helpful.
Why Dirty Makeup Brushes Can Be a Problem
A makeup brush repeatedly touches your skin and then returns to makeup products.
Over time, it can collect:
- Oil
- Dead skin cells
- Makeup residue
- Dust
- Sweat
- Microorganisms
Dermatologists warn that contaminated brushes can contribute to acne breakouts, rashes, and infections.
One laboratory study published in 2025 also found bacterial contamination in cosmetic brushes, highlighting why proper cleaning and tool hygiene matter.
Should You Share Makeup Brushes?
It is best not to share makeup brushes, particularly brushes used around the eyes, lips, or on areas with acne or broken skin.
The American Academy of Dermatology specifically advises against sharing makeup products and tools that are applied directly to the skin or eyelashes.
This is especially important when someone has an active eye infection, skin infection, or contagious skin condition.
How to Store Makeup Brushes
Proper storage can help keep your brushes clean and maintain their shape.
Good options include:
- Brush holders
- Covered brush cases
- Makeup organizers
- Protective travel cases
Keep brushes in a clean, dry environment.
Avoid leaving them in a damp bathroom area where moisture can encourage microbial growth.
For travel, use a clean brush pouch that prevents the bristles from being crushed.
When Should You Replace Makeup Brushes?
A good-quality makeup brush can last a long time when properly maintained, but eventually it may need replacing.
Consider replacing a brush if:
- Bristles are falling out excessively
- The brush has permanently lost its shape
- Bristles become rough or scratchy
- The handle is cracked
- The ferrule becomes loose
- The brush cannot be cleaned properly
- It repeatedly irritates your skin
A brush that no longer performs properly can make makeup application frustrating.
Makeup Brush Mistakes to Avoid
Using Dirty Brushes
This is one of the most common mistakes.
Regular cleaning helps remove accumulated product, oil, dirt, and microorganisms.
Using One Brush for Everything
A versatile brush can perform several jobs, but using a single brush for foundation, blush, eyeshadow, and contour without cleaning it can transfer colors and residue.
Applying Too Much Pressure
Hard pressure can flatten the bristles and make blending more difficult.
Let the brush do the work.
Using the Wrong Brush Shape
A large powder brush is not ideal for precise eyeliner.
Likewise, a tiny detail brush is inefficient for applying powder over the entire face.
Storing Wet Brushes
Always allow brushes to dry completely before storing them.
Ignoring Damaged Bristles
Rough or damaged bristles can feel uncomfortable and may produce an uneven finish.
Makeup Brushes vs. Makeup Sponges
Both brushes and sponges have advantages.
Makeup Brushes
Best for:
- Precision
- Powder products
- Detailed application
- Buildable coverage
- Sculpting
- Eye makeup
Makeup Sponges
Best for:
- Sheer or natural-looking foundation
- Blending concealer
- Cream products
- Softening harsh edges
Many makeup users combine both. For example, a brush can apply foundation while a damp sponge can soften the final finish.
Best Makeup Brushes for Different Products
| Makeup Product | Recommended Brush |
| Liquid foundation | Dense foundation or buffing brush |
| Cream foundation | Dense synthetic brush |
| Concealer | Small flat or fluffy concealer brush |
| Loose powder | Large fluffy powder brush |
| Blush | Medium rounded or angled brush |
| Bronzer | Large soft bronzer brush |
| Contour | Angled or tapered brush |
| Highlighter | Small tapered or fan brush |
| Eyeshadow | Flat packing brush |
| Crease color | Fluffy crease brush |
| Blending | Soft blending brush |
| Eyeliner | Thin angled brush |
| Brows | Angled brow brush |
| Lipstick | Small lip brush |
How to Build a Professional Makeup Brush Collection
If you are a makeup enthusiast or aspiring makeup artist, you may eventually want a larger collection.
A professional kit can include multiple versions of the same basic brush type.
For example, you might keep:
- Several foundation brushes
- Multiple powder brushes
- Different sizes of blending brushes
- Several detail brushes
- Separate lip brushes
- Multiple brow brushes
- Specialized contour brushes
The advantage is hygiene and efficiency. You can use clean brushes between clients or different products without constantly stopping to wash the same tool.
How to Make Makeup Brushes Last Longer
Good brush care can significantly extend the useful life of your tools.
Follow these habits:
- Clean brushes regularly.
- Avoid soaking the entire brush head.
- Never pull aggressively on wet bristles.
- Dry brushes flat.
- Store them in a clean place.
- Don’t crush bristles inside crowded makeup bags.
- Avoid sharing brushes.
- Replace brushes when they become damaged.
Experts also recommend avoiding overly aggressive cleaning methods that can damage brush construction.
Are Expensive Makeup Brushes Better?
Not necessarily.
Price can reflect:
- Brand name
- Materials
- Manufacturing quality
- Design
- Packaging
- Professional positioning
However, an expensive brush is not automatically the best brush for every person.
When choosing a brush, prioritize:
- Comfortable feel
- Appropriate shape
- Good bristle density
- Secure construction
- Easy cleaning
- Suitable performance
A moderately priced brush that works well and is maintained properly may be more useful than an expensive brush that does not match your makeup routine.
Makeup Brushes for Sensitive Skin
If your skin is sensitive, choose brushes with soft bristles that do not feel scratchy.
Synthetic brushes may be a good option because they are widely available in soft fibers and are easy to clean.
More importantly, maintain good hygiene. If a brush repeatedly causes irritation even after proper cleaning, stop using it and consider replacing it.
If makeup application is consistently associated with redness, itching, swelling, or other skin symptoms, a dermatologist can help identify the cause.
Conclusion
Makeup brushes are more than simple beauty accessories. They are tools that can influence how smoothly, evenly, and precisely makeup is applied. From foundation and concealer brushes to blush, contour, highlighter, eyeshadow, eyeliner, and lip brushes, each shape is designed to make a particular part of your routine easier.
You do not need a huge collection to get started. A carefully selected set of versatile brushes can handle most everyday makeup needs. As your skills and interests grow, you can add specialized tools for detailed eye makeup, contouring, professional applications, or creative looks.
Choosing the correct brush is only part of the process. Regular cleaning is equally important because dirty brushes can accumulate makeup, oil, dirt, and microorganisms and may contribute to breakouts, irritation, or infections. The American Academy of Dermatology recommends washing brushes every 7 to 10 days, while brushes used with wet products or around the eyes may require more frequent attention.
Ultimately, the best makeup brush is one that suits your products, technique, skin, and personal makeup style. Start with the essentials, learn what each brush does, keep your tools clean, and gradually build a collection that genuinely earns a place in your makeup bag.
FAQs About Makeup Brushes
1. What are makeup brushes used for?
Makeup brushes are used to apply, blend, distribute, and detail makeup products such as foundation, concealer, powder, blush, bronzer, contour, eyeshadow, eyeliner, and lipstick.
2. How many makeup brushes does a beginner need?
A beginner can start with around 6 to 8 versatile brushes, including foundation, concealer, powder, blush, eyeshadow, blending, and brow or eyeliner brushes. You can add specialized brushes later.
3. What makeup brush is best for foundation?
A dense foundation or buffing brush is commonly used for liquid and cream foundation. Synthetic bristles are often a practical choice for these formulas.
4. How often should I clean makeup brushes?
The American Academy of Dermatology recommends washing makeup brushes every 7 to 10 days. Brushes used with liquid or cream products and brushes used around the eyes may need more frequent cleaning.
5. Can dirty makeup brushes cause acne?
Dirty brushes can accumulate oil, makeup residue, dirt, and microorganisms and may contribute to acne breakouts, irritation, and some infections. Regular cleaning can help reduce these risks.
6. Are synthetic makeup brushes better than natural brushes?
Neither is universally better. Synthetic brushes are often practical for liquid and cream products and are easy to clean, while natural-hair brushes have traditionally been popular for powder products. Personal preference, performance, ethics, and maintenance all matter when choosing.
7. Can I use one makeup brush for multiple products?
Yes, some versatile brushes can be used for several products. However, clean the brush between incompatible colors or formulas to avoid transferring residue and creating a muddy makeup application.
8. How should makeup brushes be dried?
After washing, gently remove excess water and lay the brushes flat on a clean towel, ideally with the bristles extending slightly beyond the edge. Avoid drying wet brushes upright because water can move toward the handle and weaken the adhesive.
9. When should I replace a makeup brush?
Replace a brush when its bristles become excessively frayed, rough, misshapen, or loose, or when the handle or ferrule is damaged. A brush that repeatedly irritates your skin should also be replaced.
10. What are the most important makeup brushes for beginners?
The most useful beginner brushes are generally a foundation brush, concealer brush, powder brush, blush brush, flat eyeshadow brush, blending brush, and angled brow or eyeliner brush. These can cover most basic makeup applications.