Contour Stick: How to Choose and Create Naturally Sculpted Look
Introduction
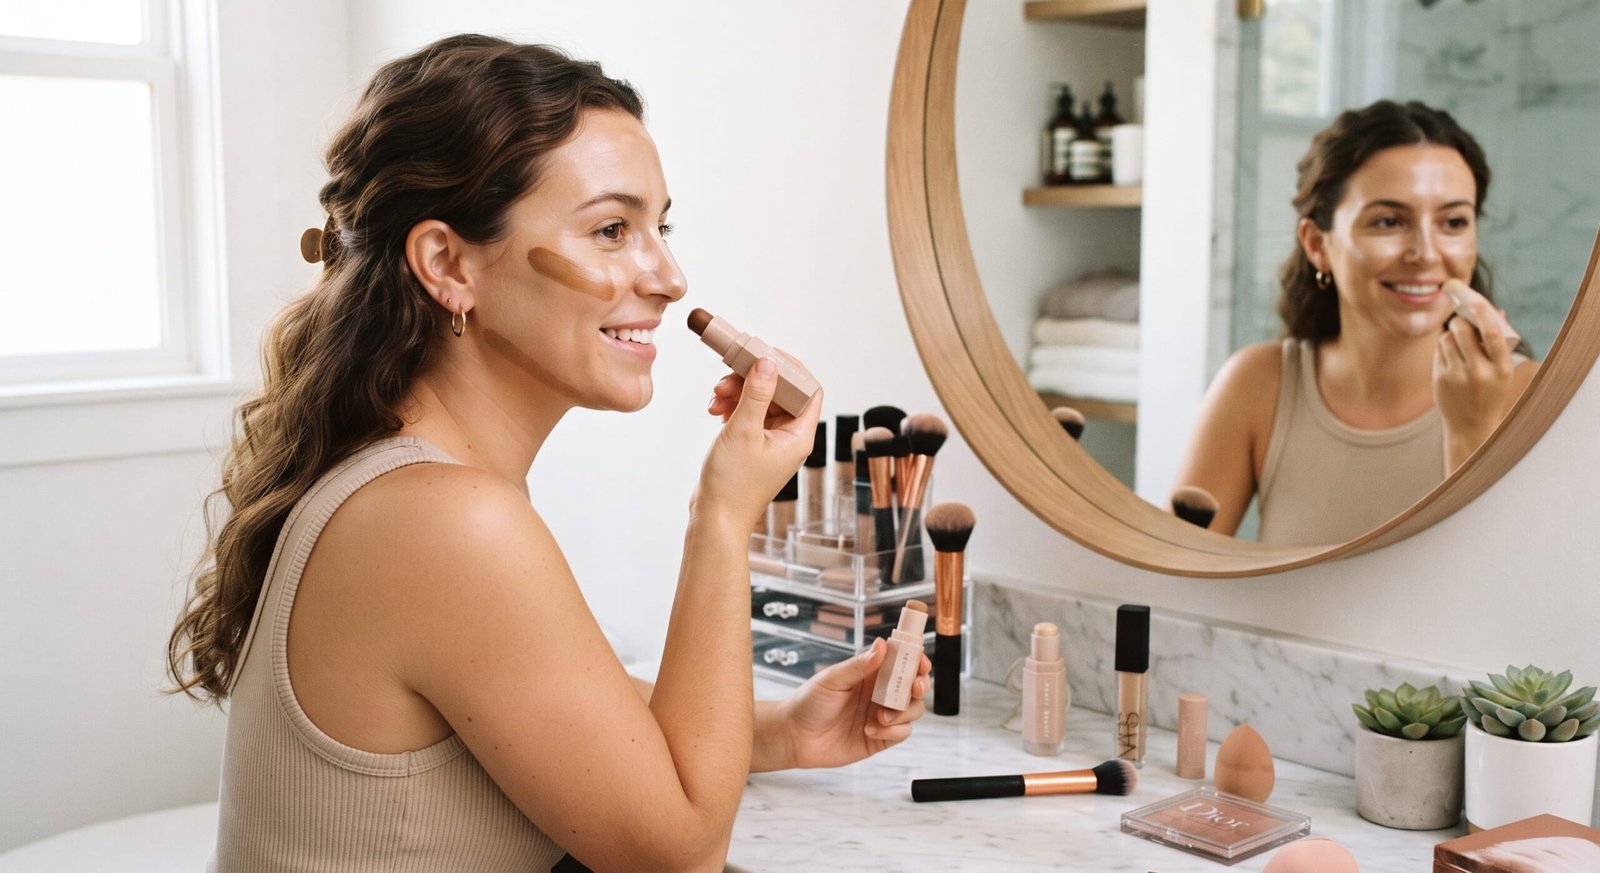
A contour stick is a popular makeup product designed to define facial features, add dimension, and create a naturally sculpted appearance. Its creamy formula and convenient stick format make it easy to apply directly to the skin, allowing beginners and experienced makeup lovers to achieve a more defined look without complicated techniques.
Unlike powder contour products, which are typically applied with a brush, contour sticks offer precise placement and can be blended with a makeup sponge, brush, or fingertips. They are available in different shades and finishes, making it easier to find an option that complements your complexion and makeup preferences.
Whether you want subtle cheekbone definition for everyday makeup or a more dramatic sculpted look for special occasions, a contour stick can be a useful addition to your makeup collection. The key is selecting the right shade, understanding where to apply the product, and blending it properly.
In this guide, we will explore what a contour stick is, its benefits, how to choose the right formula, application techniques, common mistakes, and tips for creating a smooth, natural-looking finish.
What Is a Contour Stick?
A contour stick is a cream-based makeup product packaged in a twist-up tube or similar stick container. It is used to create shadows on selected areas of the face, helping certain features appear more defined.
Contouring works by using shades that are generally deeper than the surrounding skin. When placed strategically and blended smoothly, these shades create the visual effect of depth and dimension.
Common application areas include:
- Beneath the cheekbones
- Along the sides of the nose
- Around the temples
- Along the jawline
- Near the hairline
Contour sticks are available in a range of shades, from light taupe to deep brown. Some formulas have a cool undertone, while others are warmer or more neutral.
A contour stick is different from a highlighter, which adds brightness to selected areas. It is also different from bronzer, which is generally used to add warmth and a sun-kissed appearance.
Why Is a Contour Stick So Popular?
Contour sticks have become a favorite among makeup users because they combine convenience with precise application. Their compact packaging makes them easy to carry, while the creamy formula can blend seamlessly into many makeup routines.
1. Easy Application
The stick format allows you to apply the product directly to the areas you want to define. You do not need to pour out liquid product or use a separate applicator.
2. Convenient for Beginners
A contour stick can make it easier to control product placement. Beginners can start with a few small marks and blend gradually rather than applying too much product at once.
3. Blendable Formula
Many cream contour sticks are designed to blend into the skin, creating a soft transition between the contour shade and the foundation.
4. Travel-Friendly Packaging
The solid format is convenient for handbags, makeup bags, and travel kits. It can also reduce the mess associated with some liquid makeup products.
5. Suitable for Different Makeup Looks
A light application can create subtle definition for daily wear, while additional layers can build a more noticeable sculpted effect.
6. Works With Different Complexions
Contour sticks are available in a broad range of shades. Selecting a product with a suitable depth and undertone can help it look more natural against your skin.
Contour Stick vs. Contour Powder
Both cream contour sticks and powder contour products can define facial features, but their textures and application methods differ.
Contour stick: Usually has a creamy texture that works well with liquid or cream foundation. It is convenient for targeted application and often creates a skin-like finish when blended properly.
Contour powder: Typically comes in a compact or palette and is applied with a brush. It can be useful for controlling shine, adding definition to powdered makeup, or achieving a soft matte finish.
Cream contour may be particularly appealing to people who prefer a dewy or natural-looking complexion. Powder contour can be a good option for those who prefer a matte finish or have difficulty keeping cream products in place.
Neither formula is universally better. Your skin type, foundation routine, desired finish, and application skills all influence which option works best.
Contour Stick vs. Bronzer
Contour and bronzer are sometimes used interchangeably, but they serve different purposes.
A contour product is designed to imitate natural shadows. It generally works best in a shade that complements the depth of your skin without appearing excessively orange or red.
Bronzer is primarily used to add warmth and a sun-kissed effect. It is often applied to the forehead, cheeks, and other areas where sunlight might naturally hit the face.
For example, you might apply contour beneath your cheekbones to create definition, then use bronzer slightly higher on the cheeks to add warmth.
Using both products can create a multidimensional makeup look, but either one can be used alone for a simpler routine.
How to Choose the Right Contour Stick
Selecting the correct contour shade and texture is essential for achieving a balanced result.
1. Consider Your Skin Tone
Your skin tone helps determine how deep your contour shade should be.
- Fair skin: Light taupe or soft neutral brown shades can provide subtle definition without looking harsh.
- Light to medium skin: Neutral beige-brown and soft brown shades may create natural-looking shadows.
- Medium skin: Medium brown shades can provide more visible definition while remaining balanced.
- Deep skin: Rich brown shades with suitable undertones can create definition without leaving a gray or ashy appearance.
These are general guidelines. The right shade also depends on your natural coloring and the depth of your foundation.
2. Choose the Right Undertone
Undertone plays an important role in how a contour shade looks on the skin.
Cool or neutral brown shades often resemble natural shadows more closely than strongly orange shades. However, the best choice depends on your complexion and the look you want.
If a contour product appears orange, red, or unusually gray after blending, try a different undertone.
3. Match the Formula to Your Skin Type
People with dry skin may prefer creamy formulas that spread smoothly without emphasizing dry patches. Those with oily skin may prefer a cream contour that sets well or can be lightly set with a compatible powder.
For combination skin, consider the needs of different areas of your face. You may need less product on oily areas and more careful blending on dry areas.
4. Decide on Your Preferred Finish
Some contour sticks create a natural, skin-like finish, while others appear more matte or dewy.
A natural finish is often versatile for everyday makeup. A more matte formula may work well for long-wear looks, while a luminous finish can complement glowy makeup styles.
5. Check the Blendability
A good contour stick should spread without excessive tugging and blend into the surrounding makeup without leaving obvious stripes.
Whenever possible, test the shade on your jawline or another appropriate area in natural light.
How to Apply a Contour Stick Step by Step
Applying contour does not have to be complicated. A small amount of product and careful blending can create a polished finish.
Step 1: Prepare Your Skin
Start with clean, moisturized skin. Apply sunscreen during the daytime and allow it to settle before applying makeup.
If you use primer, choose one that works well with your foundation and contour products.
Step 2: Apply Foundation
Apply your foundation or base makeup as usual. Blend it evenly before adding contour.
Cream contour sticks often work well over liquid or cream foundation. If you prefer powder foundation, test how the products layer together to avoid patchiness.
Step 3: Apply Contour Beneath the Cheekbones
Gently place a small amount of product beneath the cheekbones. A useful starting point is near the ear, moving toward the middle of the cheek.
Avoid bringing the contour too close to the corners of your mouth, particularly if you want a lifted appearance.
Use light strokes rather than drawing a thick line.
Step 4: Define the Jawline
Apply a small amount along the jawline if you want additional definition.
Blend the product downward toward the neck rather than leaving a visible stripe along the edge of the face. Make sure the transition looks natural in different lighting.
Step 5: Contour the Forehead
If desired, apply contour near the hairline. This can create a more balanced appearance, especially when the contour is blended into the surrounding makeup.
Use less product if you have a smaller forehead or prefer a subtle result.
Step 6: Contour the Nose Carefully
For nose contouring, use a small brush or a precise applicator to place a minimal amount along the sides of the nose.
Blend carefully so the lines are soft rather than sharply visible. Nose contour is optional, and the amount needed depends on your preferred makeup style.
Step 7: Blend Thoroughly
Use a damp makeup sponge, dense blending brush, or clean fingertips to soften the edges.
Blend in small movements, keeping the product close to the area you want to define. Avoid spreading it too far across the face, as this can remove the intended shadow effect.
Step 8: Finish Your Makeup
Apply blush and highlighter if desired. Blush adds color to the cheeks, while highlighter creates brightness on selected areas.
If you need extra longevity, lightly set suitable areas with translucent powder. Avoid applying too much powder over creamy products, as this can make the makeup appear heavy.
Where Should You Apply a Contour Stick?
Different placement techniques can create different visual effects. The most flattering approach depends on your features and personal preference.
Cheekbones
Applying contour beneath the cheekbones creates a shadow that emphasizes their natural structure. Blend upward and outward for a soft, balanced finish.
Jawline
A small amount of contour along the jawline can add definition. Blending is essential to avoid a visible line between the face and neck.
Forehead
Contour near the hairline can create the appearance of additional depth. Keep the application light and blend into the hairline.
Nose
A narrow, carefully blended application can create the visual impression of more defined nose contours. Avoid heavy lines that look unnatural in daylight.
Temples
A small amount around the temples can help connect the forehead and cheek contour, particularly in more sculpted makeup looks.
You do not need to contour every area. Applying the product only where you want definition often creates a more natural result.
Common Contour Stick Mistakes to Avoid
Even a high-quality product may look uneven if it is applied incorrectly. Avoiding a few common mistakes can significantly improve the final appearance.
Using Too Much Product
A thick stripe of contour can be difficult to blend and may look muddy. Start with a small amount and build gradually.
Choosing a Shade That Is Too Warm
A strongly orange or red-brown shade may look more like bronzer than contour. Select an undertone that creates a natural-looking shadow on your complexion.
Blending in the Wrong Direction
Blending contour too far downward or across the center of the cheek can make the placement look less defined. Use controlled movements to preserve the intended shape.
Applying Cream Over Powder
Applying a creamy stick over heavily powdered makeup may cause the base to lift, separate, or become patchy. In many routines, cream products are easier to blend before setting the face with powder.
Ignoring Natural Lighting
Makeup that looks balanced in a dim room may appear too dark or sharply defined in daylight. Check your makeup near a window or in neutral lighting before finishing.
Using an Unclean Applicator
Brushes and sponges can collect makeup residue, oil, and dirt. Clean them regularly and avoid sharing products or applicators when hygiene is uncertain.
How to Make Your Contour Stick Last Longer
If your contour fades or becomes patchy throughout the day, a few adjustments may help.
- Begin with a clean, moisturized face.
- Allow skin care and sunscreen to settle before applying makeup.
- Use a compatible foundation and contour formula.
- Blend the contour thoroughly before applying additional products.
- Apply a light layer of setting powder if suitable for your skin type.
- Consider a setting spray if it works well with your makeup routine.
- Avoid touching or rubbing your face excessively.
For oily skin, controlling excess shine may help maintain a more even finish. For dry skin, appropriate moisturization and gentle application can reduce the appearance of flaky areas.
Longevity also depends on the formula itself, environmental conditions, and how much makeup you apply.
Contour Stick for Beginners
If you are new to contouring, there is no need to recreate complicated makeup tutorials immediately. A simple approach is often easier to manage.
Start by choosing a contour shade that is only moderately deeper than your skin tone. Apply a small amount beneath the cheekbones and blend until the edges disappear into your foundation.
Once you are comfortable with the technique, experiment with the jawline or forehead. You can gradually adjust the placement according to the effect you prefer.
A few useful beginner tips include:
- Use natural lighting when choosing a shade.
- Begin with less product than you think you need.
- Blend one area at a time.
- Use a clean sponge or brush.
- Check both sides of the face for balance.
- Remember that contouring should enhance your makeup rather than create obvious stripes.
Practice helps you discover which placement and formula work best for your facial features.
How to Store and Care for a Contour Stick
Proper storage helps keep your makeup product clean and usable.
Always close the cap tightly after use to limit exposure to air and prevent the product from collecting dust. Store the stick in a cool, dry place away from direct sunlight and excessive heat.
Avoid leaving makeup inside a hot car, where high temperatures may affect its texture.
Do not share a contour stick directly on the skin with other people. If you are a makeup professional, use hygienic application methods and suitable disposable applicators when appropriate.
Follow the product’s packaging instructions regarding shelf life. Discard it if its smell, texture, or appearance changes unexpectedly, or if it causes irritation.
Conclusion
A contour stick is a convenient makeup essential for anyone who wants to add definition and dimension to their face. Its creamy texture, portable design, and precise application make it suitable for both beginners and experienced makeup users.
The best results come from choosing a shade that complements your complexion, applying a small amount to the appropriate areas, and blending the edges carefully. Whether you prefer subtle everyday makeup or a more sculpted finish, this product can help you customize your look.
Remember that contouring is not about changing your natural features. It is about experimenting with light and shadow to create the finish you enjoy. With the right shade, a suitable formula, and a little practice, a contour stick can become a simple and effective part of your makeup routine.
Frequently Asked Questions (FAQs)
1. What is a contour stick used for?
A contour stick is used to create shadows and add definition to facial features, including the cheekbones, jawline, temples, and forehead.
2. Is a contour stick suitable for beginners?
Yes. Its stick format allows controlled application, and beginners can start with a small amount before blending and building the color gradually.
3. How do I choose the right contour stick shade?
Choose a shade that creates a natural-looking shadow against your complexion. Consider both the depth of the color and its undertone, rather than selecting a shade based only on how dark it looks.
4. Should I apply a contour stick before or after foundation?
In most makeup routines, contour sticks are applied after liquid or cream foundation and before setting powder. However, follow the product instructions and test how the formulas work together.
5. Can I use a contour stick without foundation?
Yes. You can apply a small amount directly to moisturized skin if you prefer minimal makeup. Blend thoroughly to avoid obvious patches or lines.
6. Is contour stick better than contour powder?
Neither is universally better. Cream sticks offer convenient application and can create a skin-like finish, while powders can provide a soft matte effect and work well over set makeup.
7. Can people with oily skin use a contour stick?
Yes. People with oily skin can use a contour stick by choosing a suitable formula, applying it sparingly, and setting it lightly with powder when needed.
8. How do I prevent my contour stick from looking muddy?
Choose a suitable undertone, apply less product, and blend the edges carefully. Avoid placing too many layers of different complexion products in the same area.
9. Can a contour stick be used as a bronzer?
Some products can serve both purposes, but contour and bronzer have different roles. Contour creates shadow, while bronzer generally adds warmth. Check the shade and formula before using one product for both.
10. How long does a contour stick last on the skin?
Wear time depends on the formula, skin type, weather, and other makeup products. A compatible foundation, careful blending, and suitable setting products may help it last longer.