Curling Wand: A Complete Guide to Beautiful, Long-Lasting Curls
Introduction
Beautiful curls can transform an everyday hairstyle into something elegant, playful, or glamorous. Whether you prefer loose beach waves, soft romantic curls, or defined spirals, a curling wand is a versatile styling tool that helps you achieve different looks at home. Unlike traditional curling irons with a clamp, most curling wands feature a heated barrel around which you manually wrap your hair. This design allows greater flexibility when creating natural-looking curls and waves.
However, choosing the right tool involves more than picking an attractive design. Barrel size, heat settings, hair type, barrel material, and styling technique all affect the final result. Using the wrong temperature or curling technique can also contribute to dryness, breakage, and split ends.
This comprehensive guide explains how curling wands work, how to choose the right one for your hair, and how to create beautiful curls safely. You will also discover practical styling tips, common mistakes to avoid, and ways to make your hairstyle last longer.
What Is a Curling Wand?
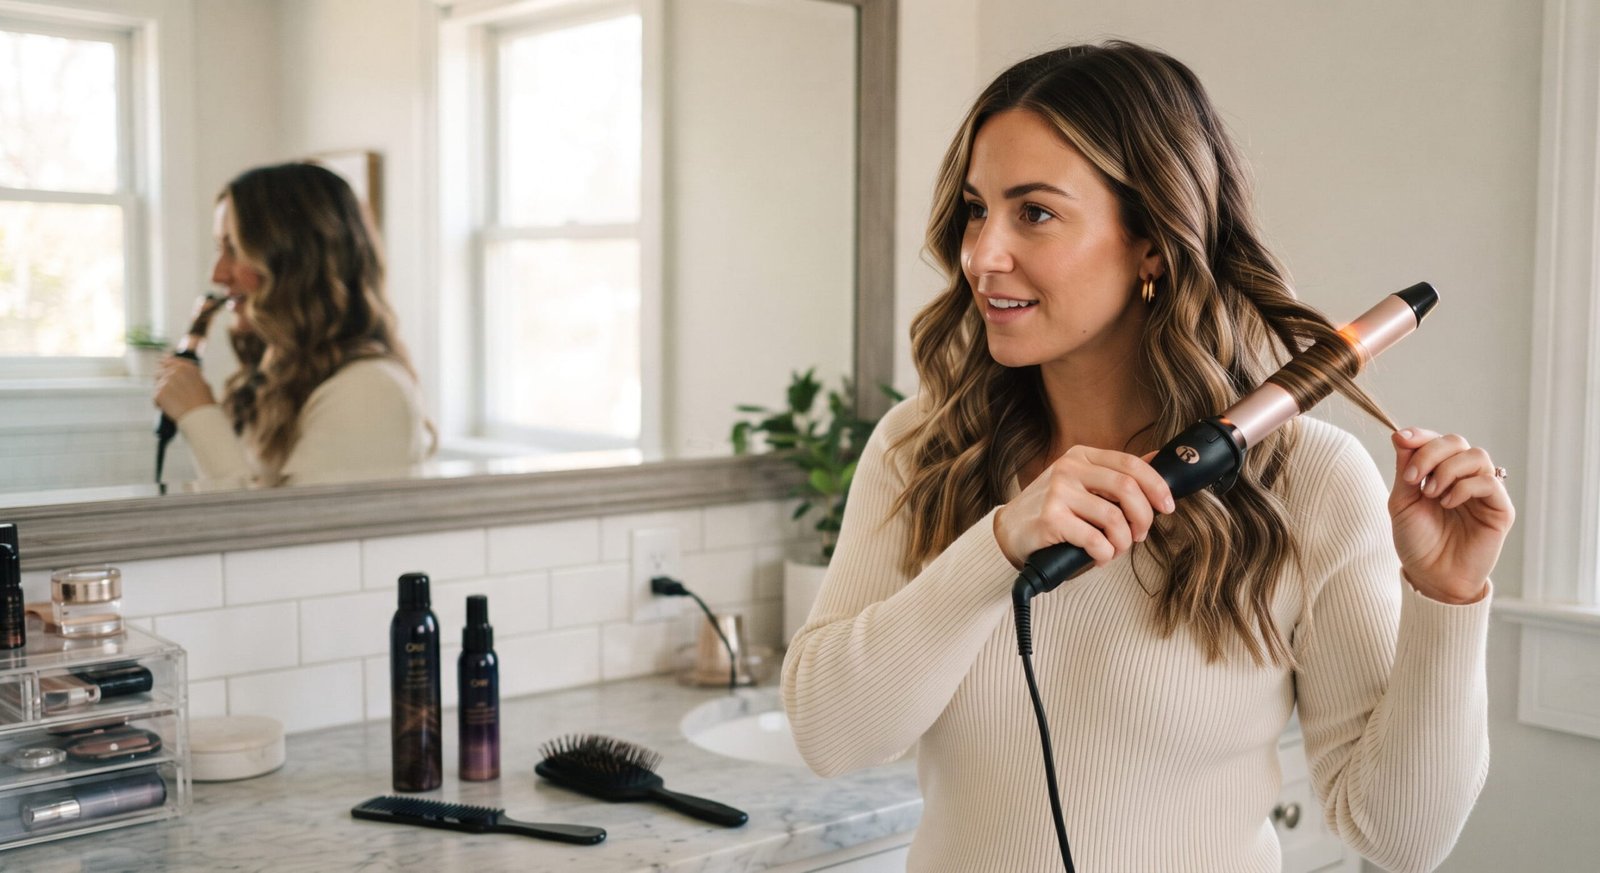
A curling wand is a heated hair-styling device designed to create curls and waves. It usually consists of a handle, a heated barrel, adjustable temperature controls, and a power cord. Unlike a conventional curling iron, a standard wand generally does not have a clamp to hold the hair in place.
To use it, you wrap a section of hair around the barrel, hold it for a short period, and carefully release it. The heat temporarily reshapes the hair, allowing the curl to maintain its form until moisture, movement, or humidity gradually relaxes it.
Curling wands are available in different shapes and sizes. Some have straight barrels for uniform curls, while others feature tapered barrels that create curls of different widths. Certain models also offer interchangeable attachments, allowing you to experiment with several hairstyles using one device.
These tools are popular because they can create everything from relaxed everyday waves to polished curls suitable for weddings, parties, and formal occasions.
Benefits of Using a Curling Wand
1. Creates Natural-Looking Curls
One of the main advantages of a wand is its ability to create curls without leaving a noticeable clamp mark. When used correctly, it produces soft, flowing curls that blend naturally with the rest of the hair.
2. Offers Multiple Styling Options
Depending on the barrel size and wrapping technique, you can create loose waves, classic curls, tight spirals, or voluminous hairstyles. This versatility makes the tool useful for different occasions.
3. Provides Greater Styling Flexibility
Without a clamp, you can change the direction of the curl, leave the ends straighter, or wrap hair at different angles. These techniques help you customize your hairstyle.
4. Works for Different Hair Lengths
Long hair can be styled into flowing waves, while medium-length hair can achieve bouncy curls and textured looks. Shorter hair may also benefit from a narrow barrel designed for shorter sections.
5. Can Add Volume and Movement
Curling the hair away from the scalp and allowing the curls to cool before brushing can create additional body. This is especially helpful for people whose hair tends to look flat.
Different Types of Curling Wands
Not all wands produce the same results. Understanding the available designs helps you select a suitable tool for your styling goals.
Straight-Barrel Wands
Straight-barrel models have a consistent diameter from top to bottom. They generally create uniform curls throughout each section of hair.
These are useful for classic curls, defined waves, and hairstyles that require a consistent pattern.
Tapered Wands
Tapered designs have a wider base and a narrower tip, or the reverse. They create curls that vary in size along their length, resulting in a more textured appearance.
A tapered wand can be a good option if you prefer natural-looking curls rather than perfectly identical spirals.
Conical Wands
Conical wands gradually narrow toward the tip. They are particularly useful for creating curls with varied dimensions, including tighter ends and fuller sections near the roots.
Because the barrel narrows, beginners should practice wrapping hair carefully to maintain consistent results.
Reverse-Tapered Wands
These models have a narrower base and a wider tip. Depending on the design and how hair is wrapped, they can produce curls with a different distribution of volume.
They are less common than traditional straight and tapered designs.
Interchangeable-Barrel Wands
Interchangeable systems allow you to switch between different barrel sizes and shapes. One attachment may be suitable for loose waves, while another creates smaller curls.
These systems can be convenient for people who frequently change their hairstyles. However, it is important to ensure that the attachments lock securely and are compatible with the handle.
Choosing the Right Barrel Size
Barrel diameter plays an important role in determining the shape of your curls. Although hair length, thickness, and technique also matter, the following measurements provide a useful starting point.
| Barrel diameter | Typical styling result |
| 9–13 mm | Tight, defined curls |
| 16–19 mm | Small, springy curls |
| 25 mm | Classic, medium-sized curls |
| 32 mm | Loose curls and soft waves |
| 38 mm or larger | Broad waves and a voluminous finish |
These results are approximate rather than guaranteed. Hair that is naturally straight, heavy, or resistant to styling may produce a different outcome from fine or naturally wavy hair.
For short hair, a narrower barrel often provides better control. Medium-length hair can work well with a 19–32 mm barrel, depending on the desired look. Long hair may benefit from a larger barrel for loose waves or a medium barrel for more defined curls.
If you are buying your first wand, a barrel around 25 mm is a versatile starting point for many medium-length hairstyles.
How to Choose a Curling Wand for Your Hair Type
Fine or Thin Hair
Fine hair can be more vulnerable to heat damage, so temperature control is particularly important. Choose a model with adjustable heat settings and start at a low temperature.
Smaller sections may help curls form more consistently, but avoid holding the hair against the barrel for longer than necessary.
A lightweight wand with a smooth barrel can also make styling easier.
Thick Hair
Thick hair may require more time and careful sectioning to achieve consistent curls. Look for a device with reliable temperature control, an adequately long barrel, and a design that can accommodate your hair length.
Rather than immediately selecting the highest temperature, test a moderate setting and adjust only if needed.
Curly or Wavy Hair
Naturally curly or wavy hair can benefit from a wand when you want to refine the curl pattern, smooth uneven sections, or create a more uniform finish.
Make sure your hair is completely dry before applying direct heat. Work in manageable sections and avoid repeatedly heating the same area.
Long Hair
Long hair can be difficult to wrap around a short barrel. An extended-barrel model may make styling faster and more comfortable.
Consider the size of the curls you want, as well as the length of each section. Very large sections may heat unevenly and produce curls that fall quickly.
Short Hair
Short hairstyles often require precision. A narrow barrel can create defined curls, while a slightly wider option may help produce soft bends.
Choose a wand that allows you to work close to the roots without bringing the hot barrel into contact with your scalp.
Important Features to Look For
Adjustable Temperature Settings
Different hair types respond differently to heat. Adjustable settings let you begin at a lower temperature and increase it only when necessary.
A wide temperature range is useful, but the highest setting is not automatically the best choice.
Ceramic Barrels
Ceramic-coated barrels are designed to distribute heat across the styling surface. They can provide smooth results when the coating is in good condition.
Keep in mind that the quality of the overall device and your styling technique matter just as much as the barrel material.
Tourmaline Technology
Tourmaline is sometimes incorporated into hair-styling surfaces to help reduce static and frizz. Marketing claims vary, so focus on the wand’s actual performance, temperature controls, and safety features rather than relying on one material alone.
Titanium Barrels
Titanium heats quickly and is commonly used in professional styling tools. Some models can reach high temperatures, which may be excessive for fine or damaged hair.
Choose a device with suitable heat controls and follow its instructions.
Safety Features
Useful features may include automatic shutoff, a heat-resistant glove, a cool tip, a stable stand, and a swivel cord.
A glove can help reduce accidental burns, but it does not make direct contact with a hot barrel completely safe.
Barrel Length and Weight
An extended barrel may help with long hair, while a lightweight handle can reduce hand fatigue during styling.
The best design is one that feels comfortable, provides good control, and suits the length and thickness of your hair.
How to Use a Curling Wand Step by Step
Learning the correct technique can improve your results while reducing unnecessary heat exposure.
Step 1: Start With Completely Dry Hair
Never use a standard curling wand on wet or damp hair unless the specific device is explicitly designed for that purpose.
Dry your hair thoroughly and detangle it gently. Wet hair is more vulnerable to damage from direct heat.
Step 2: Apply a Heat Protectant
Distribute a suitable heat-protectant product through your hair according to its instructions. Allow the product to dry completely before using the wand.
Heat protectants can help reduce damage, but they do not eliminate it.
Step 3: Divide Your Hair Into Sections
Separate your hair into manageable sections using clips. Working in smaller sections generally produces more consistent curls.
If your hair is thick, you may need additional sections to ensure that each strand receives reasonably even heat exposure.
Step 4: Select an Appropriate Temperature
Begin with a lower setting, particularly if your hair is fine, bleached, chemically treated, or already damaged.
Increase the temperature cautiously if the curls do not form, rather than automatically selecting maximum heat.
Step 5: Hold the Wand Safely
Hold the handle with the barrel pointing downward or at a comfortable angle, depending on the style you want.
If your device includes a heat-resistant glove, wear it as directed. Keep your fingers, face, ears, and scalp away from the hot barrel.
Step 6: Wrap a Section Around the Barrel
Take a small section of hair and wrap it around the barrel, moving away from your face when styling the front sections for a flattering, open appearance.
Leave the very ends out if you prefer a relaxed, modern wave. For more defined curls, wrap the section more fully around the barrel.
Avoid overlapping too much hair, as this can lead to uneven heating.
Step 7: Release the Curl Carefully
After a brief exposure appropriate to your hair type and the manufacturer’s instructions, gently release the hair.
Do not pull the curl forcefully from the barrel. Let it slide off naturally to preserve its shape.
Step 8: Allow the Curls to Cool
Let the curls cool completely before brushing or separating them. Cooling helps the temporary shape settle.
For longer-lasting curls, you can gently support each curl in your palm or pin it loosely until cool, provided you can do so without touching the hot barrel.
Step 9: Finish Your Hairstyle
Once the curls have cooled, separate them gently with your fingers or a wide-tooth comb.
Use a light finishing spray if desired. Avoid applying excessive products, as heavy formulations can weigh down the hair.
Popular Hairstyles You Can Create
Beach Waves
Beach waves have a relaxed, slightly undone appearance. Use a medium or large barrel, curl alternating sections in different directions, and leave some ends straight.
After the hair cools, gently loosen the waves with your fingers. A lightweight texturizing product can help enhance the finish.
Classic Defined Curls
For traditional curls, choose a barrel size that matches your preferred curl diameter. Wrap sections in a consistent direction and allow each curl to cool before styling further.
This approach works well for formal occasions, celebrations, and polished everyday looks.
Hollywood Waves
Hollywood-inspired waves are smooth, structured, and glamorous. Begin by creating uniform curls in the same direction.
Once the curls have cooled, brush them gently into a connected wave pattern. A suitable finishing spray can help maintain the shape.
This style often requires more time and careful sectioning than casual waves.
Voluminous Curls
For added body, lift each section away from the scalp while styling and allow the curls to cool before separating them.
Avoid applying heavy oils or creams before curling, as these may make the hair look flatter.
Loose Everyday Waves
Use a larger barrel and wrap sections loosely. Alternate curl directions or focus on the mid-lengths for a natural result.
Finish by separating the waves with your fingers rather than brushing them extensively.
Curls With Straight Ends
For a modern, relaxed look, wrap only the mid-lengths of your hair and leave the last few centimeters uncurled.
This technique works particularly well for casual hairstyles and loose waves.
Common Curling Wand Mistakes to Avoid
Even a high-quality tool can produce disappointing results when used incorrectly.
Using too much heat: Excessive temperature can weaken the hair and increase dryness and breakage. Use the lowest effective setting.
Curling damp hair: Applying direct heat to wet hair can cause serious damage. Ensure that your hair is fully dry before styling.
Skipping heat protection: A heat protectant may help reduce thermal damage. Apply it correctly and allow it to dry before curling.
Taking oversized sections: Thick sections may not heat evenly, producing curls that fall out quickly. Divide your hair into manageable sections.
Holding the hair against the barrel for too long: Longer exposure does not necessarily produce better curls. Follow the manufacturer’s guidance and avoid repeated heating.
Brushing curls immediately: Brushing while the hair is still warm can cause the curls to lose their shape. Allow them to cool first.
Using too much styling product: Heavy creams, oils, or sprays may make curls look greasy or limp. Start with small amounts.
Neglecting maintenance: Product buildup can affect the styling surface. Clean the barrel only after the appliance is unplugged and completely cool, following the manufacturer’s instructions.
How to Make Your Curls Last Longer
Curl longevity depends on hair texture, humidity, products, and technique. Although no method works equally well for everyone, a few practical adjustments can improve results.
First, begin with clean or appropriately prepared hair. Excessive conditioner, heavy oils, and rich styling products may make fine hair too slippery to hold curls.
Second, use a heat protectant and work with manageable sections. Ensure that each section is curled evenly without excessive exposure to heat.
Third, allow every curl to cool completely before brushing. This is one of the simplest ways to preserve definition.
Fourth, use a lightweight hairspray or curl-setting product that suits your hair type. Applying a small amount is often more effective than coating the hair heavily.
Finally, protect your hairstyle from humidity and friction. If you sleep with styled hair, consider a loose protective arrangement and a smooth pillowcase. Avoid tight elastics that can flatten the curls.
Remember that naturally straight or very heavy hair may not hold curls as long as other hair types. Repeatedly increasing heat to compensate can create damage without solving the underlying problem.
Curling Wand vs. Curling Iron
A curling wand and a traditional curling iron serve similar purposes, but their designs offer different advantages.
A wand generally has no clamp, allowing you to wrap hair freely and create curls without a clamp crease. It can be especially useful for beach waves and varied curl patterns.
A curling iron typically includes a clamp that holds the hair against the barrel. This may provide more control for beginners and can make it easier to curl hair without holding the section manually.
Wands often require greater attention to hand placement because the hot barrel remains exposed. Curling irons also require care, but their clamp changes how the hair is handled.
Neither tool is universally better. Choose according to your preferred hairstyle, experience level, comfort, and safety needs.
How to Care for Your Curling Wand
Proper maintenance helps preserve the device and supports safer styling.
Always unplug the wand after use and let it cool completely on a heat-resistant surface. Never leave a hot appliance unattended or place it near towels, bedding, paper, or other flammable materials.
Remove product residue using only the cleaning method recommended by the manufacturer. Do not immerse the appliance in water or use abrasive cleaners unless the instructions specifically permit them.
Store the device in a dry location after it has cooled. Avoid tightly wrapping the power cord around the handle, as repeated bending can damage the cable.
Inspect the cord, plug, barrel, and controls regularly. Stop using the appliance if you notice exposed wires, unusual electrical smells, sparking, or other signs of damage.
If the wand has automatic shutoff, treat that feature as an additional safeguard rather than a reason to leave it unattended.
Frequently Asked Questions
1. What is a curling wand used for?
A curling wand is used to create different types of curls and waves, including beach waves, tight spirals, classic curls, and voluminous hairstyles. The barrel size and wrapping technique determine much of the final result.
2. Is a curling wand better than a curling iron?
Neither tool is always better. A wand offers flexibility and can create natural-looking curls without clamp marks, while a curling iron provides a clamp that may be easier for beginners to control.
3. What size barrel is best for beginners?
A 25 mm barrel is a versatile starting point for many people who want medium-sized curls. However, the ideal size depends on your hair length and whether you prefer tight curls or loose waves.
4. Can I use a curling wand on short hair?
Yes. A narrow barrel can help create defined curls on short hair, while a slightly wider barrel can produce softer bends. Choose a tool that offers good control and keep the hot barrel away from your scalp.
5. Should my hair be wet or dry before curling?
Your hair should be completely dry before using a standard curling wand. Applying direct heat to damp hair can cause damage. Always follow the instructions for your particular device.
6. Does a curling wand damage hair?
It can cause dryness, breakage, and other forms of heat damage, especially when used at high temperatures or too frequently. Using an appropriate heat protectant, reducing exposure time, and choosing a suitable temperature can help reduce the risk.
7. How long should I hold my hair on the barrel?
There is no single timing rule for every hair type and device. Follow the manufacturer’s instructions, start with brief exposure, and avoid repeatedly heating the same section. Longer exposure is not necessarily better.
8. How can I make my curls last all day?
Curl manageable sections, allow the curls to cool completely, and use a lightweight setting product if appropriate. Protect your hair from humidity and avoid brushing the curls before they cool.
9. Can a curling wand create beach waves?
Yes. A medium or large barrel can create relaxed beach waves. Alternate the direction of the curls, leave some ends straight, and gently separate the waves after they cool.
10. How often can I use a curling wand?
There is no universally safe frequency because the answer depends on your hair condition, temperature, and technique. Frequent heat styling can increase damage. Consider reducing use if your hair becomes dry, brittle, rough, or prone to breakage, and incorporate heat-free styling methods when possible.
Conclusion
A curling wand is a versatile tool for creating everything from relaxed beach waves to elegant, defined curls. Choosing the right barrel size, selecting an appropriate temperature, and learning a consistent wrapping technique can make styling easier and more effective.
For the best results, begin with completely dry hair, use a suitable heat protectant, work in manageable sections, and allow the curls to cool before brushing. Pay attention to your hair’s condition rather than relying on maximum heat or repeated styling.
With the right technique and sensible heat protection, you can create a variety of beautiful hairstyles while helping your hair remain smooth, manageable, and healthy-looking.